Presets |
  
|
Presets |
|
Two kind of presets are supported in AlterPhoto: standard presets and AI presets.
There presets allow you to apply color adjustments, transformations, filters to the photo in one click.
The list of presets if editable. You can add your own presets, edit and remove existing presets.
To instantly apply preset to current photo, select the item in the main menu:
Image -> Apply Presets -> select desired preset.
To edit existing presets, select the item in the main menu:
Image -> Apply Presets -> Edit Presets...
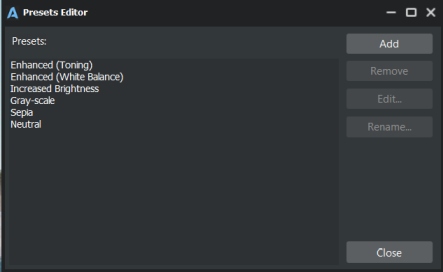
Here you can Add new presets, remove existing presets, rename them.
To add new preset click at "Add" button, specify preset name. You will see the Preview window. On preview window you can't see the actual photo, instead the sample photo is used.
Select the appropriate tab, and configure the adjustments / transformations / filters. These adjustments / transformations will be applied to the photo when you select this preset in menu -> Apply Preset in the future.
Click OK to save the preset and add it to the list of presets.
To edit preset, select it in the list, click "Edit..." button.
To rename the preset, select it in the list, click "Rename" button. Enter new name for preset and click OK button to save.
To remove preset, select preset in the list, click "Remove" button.
When you finished editing presets, click at "Close" button.
Standard presets also can be used from the Variants panel:
![]() - To create several versions of the current photo / project, based on the selected presets, click the "Add Variants Using Presets" button, then choose presets, and click OK.
- To create several versions of the current photo / project, based on the selected presets, click the "Add Variants Using Presets" button, then choose presets, and click OK.
This is second type of presets, which use "Stability AI" Generative AI service instead of the internal functionality of the program. More about generative AI can be found here.
To instantly apply AI preset to current photo, select the item in the main menu:
Generative AI -> Apply Presets -> select category -> select desired preset.
Wait until the photo is uploaded to Stability AI service, processed there, and returned to AlterPhoto. You can see the progress in the window. When it's finished, you can close the window.
To edit existing presets, select the item in the main menu:
Generative AI -> Apply Presets -> Edit Presets...
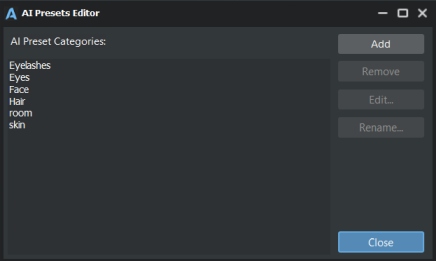
Here you can Add new categories of presets, remove existing categories, rename them.
To add new AI category click at "Add" button, specify category title. The title should identify the object to be found in the photo. For example, "Sky":
You will see the window :
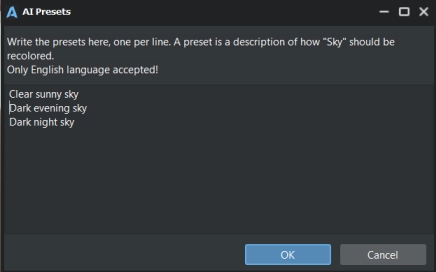
In this window, you need to write presets - one in each line. This should be a description of how to repaint the found object.
In this example we created 3 presets:
Clear sunny sky
Dark evening sky
Dark night sky
Warning! Only English language is supported for preset name and for preset strings.
Click OK to save the presets and add new category to the list of categories.
To edit presets of category, select categoty in the list, click "Edit..." button.
To rename the category, select it in the list, click "Rename" button. Enter new name for category and click OK button to save.
To remove category, select category in the list, click "Remove" button.
When you finished editing categories, click at "Close" button.
Now created presets are available in the main menu -> Generative AI -> Apply Presets...